In this tutorial we will learn how to create simple 3D text in coreldraw.
Create 3D txt in corel draw is easy and simple.
The image below is the final result we will get.
 |
| create 3D text in CorelDraw |
Application: CorelDraw X6
Time : 15 Minutes
The following steps are to be followed:
Step 1
Open Coreldraw in your Computer.
Create new document.
Activate the Text tool (F8).
Select Franklin Gothic Heavy font with grey fill colour and Black line colour.
Step 2
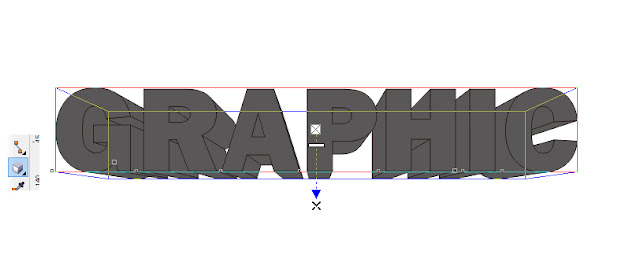
Select Extrude tool.
Drag from the top to bottom of text.
Look at this image below.
Choose extrusion type, and we will get this result like this image below.
Step 3
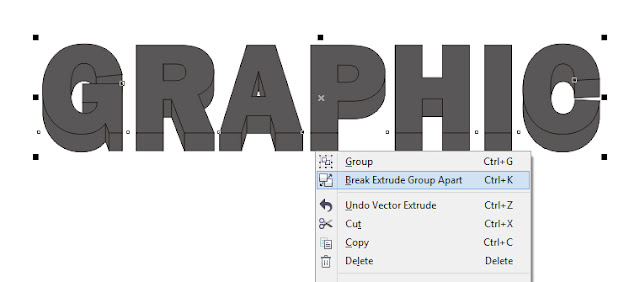
Right click on Extrude and select Break Extrude Group Apart or press Ctrl+K on your keyborad.
Read also : How to Create Triangulation art in CorelDraw
Step 4
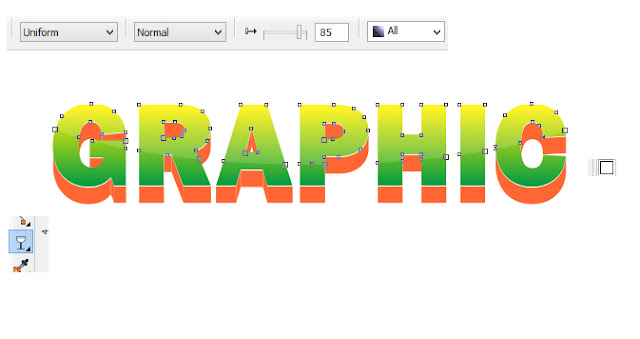
For Text Graphic, we use Fountain fill with yellow and green Colours.
Set fountain fill box with these settings
For while we will get result like this image below.
For extrusion object fill with orange Colour
Step 5
Go to Ellipse tool (F7), Draw Circle on Graphic text
Select Circle and Graphic text and then use Intersect Fungtion to both
For Result of intersect. Fill with white colour and use Transparency tool with uniform type, normal transparency operation and set opacty 85%.
Final.
Thisi is final result for this tutorial.
Thank you to followed this tutorial,
Hopefully this article usefull for us.


1 comments so far
EmoticonEmoticon